


How to Have An Anonymous Number ?
5/15/2014
 Today I'm gonna tell you a simple yet very effective trick to have anonymous mobile number to bypass any verification, which need mobile number. So let's
You Need Following Android App:
- Text plus
- Burner
How to find your text plus number?
At the top right corner click that go to settings and then contact info. Your number should be at the bottom.
Now open the Burner app and click get started. Enter your text plus number and leave the other box blank. Type in the verification code when you receive it. There you go! It is very simple to figure out how to use the app.
Enjoy.......
Run Two OS Simultaneously With Virtual Box
4/01/2014
Download VirtualBox from Here
For Installation read this -
How To Install VirtualBox on Windows 7
After installation,
Creating a virtual machine with VirtualBox 4.0
The first time you fire up VirtualBox 4.0, you get to see the new Manager screen in action, as shown in Figure 9. Although sparse at the beginning, the Manager screen will be populated as you add virtual machines.
Figure 9: VirtualBox Manager
To add a new virtual machine, simply click the New button. This starts a wizard-based process that gathers information necessary for VirtualBox to create the new virtual machine. On the first page of the wizard, you are asked to provide a name for the new virtual machine and to indicate the operating system and version that will comprise the guest virtual machine. VirtualBox supports a huge variety of guests, including:
- Windows guests. Windows versions from Windows 3.1 to Windows 7
64-bit are supported. Both desktop and server versions of Windows are
supported guests.
- Linux. A ton of Linux systems are supported. Too many to list!
- Solaris.
- BSD.
- OS/2. Including OS/2 Warp 3, 4 & 4.5, among others.
- Mac OS X Server.
- DOS.
- Netware.


Every machine, even virtual ones, need RAM. VirtualBox provides you with a minimum RAM recommendation that is based on the operating system that you selected. As you can see in Figure 12, VirtualBox recommends a base memory size of 512MB for Windows 7 64-bit. I’ve chosen instead to assign 1 GB of RAM to the virtual machine.

Figure 12: Add RAM to the virtual machine
Virtual machines also need storage space. This is the job of the virtual hard disk. A virtual hard disk in VirtualBox is stored as a file on the host. You can choose to create a new virtual disk or use an existing one. Since I have yet to create a virtual disk under VirtualBox, I’ll choose the Create option (Figure 13).
Figure 13: Choose your hard disk option
This starts the Create New Virtual Disk Wizard.

Figure 14: The new disk wizard starts
There are two kinds of storage available: Fixed-size and dynamically expanding storage. For desktop virtualization, I usually use the dynamic option since it uses less disk space; the virtual disk file simply grows as new data is added to the virtual machine. This does result in a slight performance hit, but I don’t need to allocate the entire amount of disk space up front. Figure 15 includes additional text explaining the difference between the storage types.

Figure 15: Select your storage type
The virtual disk file needs to be stored in a folder on the host. By default on my host, this location is C:\Users\Scott\VirtualBox VMs\Win7. To change the location, click the folder icon to the right of the Location field in Figure 16. Next, specify the size of the virtual disk. I’ve decided to create a 60 GB virtual disk for my Windows 7 virtual machine.

Figure 16: How large should the virtual disk be?
The Create new Virtual Disk Summary page – shown in Figure 17 – displays the storage related options you made.

Figure 17: The new virtual disk has been created
Finally, VirtualBox presents to you a summary page outlining the selections you made throughout the process. Click the Finish button once you’ve reviewed your selections.
Figure 18: The new virtual machine has been created

Once the virtual machine is created, another wizard – the First Run Wizard – starts automatically and asks you to provide installation media for the virtual machine. You can point the virtual machine to a physical DVD drive or you can point it to an ISO image of an operating system installation disc, which I have done in Figure 19.
Figure 19: Choose installation media
When done, the virtual machine enters a running state and boots from the installation media. In Figure 20, you can see my running Windows 7 virtual machine. The OS isn’t fully installed yet, but the virtual machine is operational.


Figure 20: The VM is running
.
Hack A Facebook Account With ARP Poisoning
4/07/2013
This article is a revised and a more advanced version of what we learned in the post "Facebook Cookie Stealing And Session Hijacking",
.jpg "hack facebook account") you have to used a packet sniffer called "Wireshark" to
capture packets on a wireless network and finally captured facebook's
authentication cookie and replaced the victims authentication cookie
with our own authentication cookie allowing us to hack the facebook account. However this post would be more related to hacking a facebook account on a LAN with ARP Poisoning or Man in the middle attack.
you have to used a packet sniffer called "Wireshark" to
capture packets on a wireless network and finally captured facebook's
authentication cookie and replaced the victims authentication cookie
with our own authentication cookie allowing us to hack the facebook account. However this post would be more related to hacking a facebook account on a LAN with ARP Poisoning or Man in the middle attack.You may also read this :-
Hack Facebook Account by Fake Profile Trick
How to Hack Facebook Status by SMS Spoofing
Lan Sniffing - Core Concepts
- If you are sniffing on a local area network (LAN), first of all you should make sure that your Network card is in the promiscuous mode.
- Next up you should know the difference between a hub and a switch based network, in case of a hub based network a normal packet sniffer would do the job, however in case of a switch based network we would need to launch an attack called "ARP Poisoning attack" or "Man in the Middle attack" in order to route the victims traffic through us.
Before reading this tutorial I would recommend you to part1, part2 and part 3 of my Gmail Session Hijacking and Cookie stealing series, So you could have better understanding of what I am doing here.
Logic And Methodology:
The tutorial is divided in to three main steps:
Step 1
First of all we would use "ARP Poisoning" or "Man In the Middle Attack" in order to poison victims "ARP CACHE" and route all the traffic through our computer.
Step 2
Since all the traffic would be rotued through our computer, we would simply launch a packet sniffer (Wireshark) and capture the authentication cookies for facebook.
Step 3
Finally we would replace the victims authentication cookie with our
cookies and therefore hacking into victims Facebook account.
Tools
Hack A Facebook Account [ARP Poisoning] {STEP 1 }
Step 1 - Download "Cain and Abel" from the link above and launch it.
Step 2 - Turn on the sniffer by clicking on the Green button at the top, Next scan for the Mac Addresses by clicking on the plus sign (+) at the top.

Step 3 - Once you have scanned all the Mac Addresses and IP
addresses, it's time to perform the Man In the middle attack. For that,
Click on the APR tab at the bottom and then click on the white area in
the top frame. This will turn the "+" sign into blue color.

Step 4 - Next click on the "+" sign, lists of hosts will
appear, select the hosts which you want to intercept the traffic
between. In my case at the left side would be my default gateway and on
the right would be my victim hosts.

Step 5 - Click ok and then finally click the "Yellow Button" just under the file menu of "Cain and abel", Now it will start poisoning the routes in a short span of time and you would start to see traffic being captured by cain and abel.


Monitor a Facebook Account from any where in the world
Hack A Facebook Account [Packet Sniffing Wireshark] {STEP 2}
So, since we have already poisoned victim's ARP Cache, all the traffic
going from the victim to the router will be captured by our packet
sniffer (Wireshark). But before we capture the cookie, i would like to
explain briefly regarding "Facebook Authentication Cookies".
Facebook Authentication Cookies
Well, at the time i wrote the tutorial "Facebook Cookie Stealing And Session Hijacking" Facebook used "Datr" as their authentication cookie, Now facebook uses two cookies instead of one, namely "c_user" and "xs" for
authenticating a user. Therefore we would need to capture both of these
cookies and replace them with our cookie to hack a facebook account.
So here is how you would capture authentication cookies with facebook.
Step 1 - First of all download wireshark from the official website and install it.
Step 2 - Next open up wireshark click on analyze and then click on interfaces.

Step 3 - Next choose the appropriate interface and click on start.
Step 4 - Continue sniffing for around 10 minutes.
Step 5 - After 10minutes stop the packet sniffing by going to the capture menu and clicking on Stop.
Step 6 - Next set the filter to http.cookie contains “datr” at
top left, This filter will search for all the http cookies with the name
datr, And datr as we know is the name of the facebook authentication
cookie.

Step 7 - Next right click on it and goto Copy - Bytes - Printable Text only.

Step 8 - Now you would see lots of cookie values, however c_user and xs would be the only ones of our interest. Copy both of the values in a notepad.
Hack A Facebook Account [Cookie Editing] {Step 3}
Now, finally it's time to hack a facebook account by using the cookie
values we captured, for this purpose you would need a cookie editor, I
will use a firefox addon called "Cookie Manager" to replace the cookies.
Step 1
First of all open up firefox and browse to http://facebook.com.
Step 2
Next open up the cookie manger (Tools - CookieManager+)
Next open up the cookie manger (Tools - CookieManager+)
Step 3
Next click the "add" button. Fill in the following values: (Take a look at the screenshots below for more clarification)
Next click the "add" button. Fill in the following values: (Take a look at the screenshots below for more clarification)
For Authentication Cookie: c_user
Name: c_user
Value: The value of the cookie that was captured.
Host: .facebook.com
For Authentication Cookie: xs wire shark cookie dump option paste ur cookie here
Name: xs
Value: The value of the cookie that was captured.
Host: .facebook.com

I HOpe u will like this.
How to Hack Facebook Status by SMS Spoofing
12/18/2012
How to Hack Facebook Status by SMS Spoofing
.jpg)
You may also read this :-
Hack A Facebook Account With ARP Poisoning
Hack Facebook Account by Fake Profile Trick
2. Now, Fill all detail & its important to fill your valid mobile no. & email because password on it.

3. After you Successfully completed the registration, you will receive a sms on your number. Just use that password and your Username to login. After you successfully login, you will see a similar page. Click on the ‘Send SMS to Number’ option from the Left pane.

4. The First Textbox is for Receiver’s number. Just insert the number which is used to update the status or comment on Facebook through mobile. This number is Country specific.
For e.g : In India, its 919232232665.
The 91 is the Country Code and the remaing 9232232665 is the real number.
So just write your Country specific Facebook Number for Facebook Mobile.

5. The Second Textbox is for Sender’s Number. Just write the Mobile number of the Victim who have Activated Facebook Mobile.
For e.g : Here its, 911234567890. Again, the 91 is for Country Code and the remaining is the Victim’s 10 digit Mobile number.
6. Leave the Message Template option as it is.
7. Write the Message you want to write in the Status of Victim’s Profile. Sometimes, it may take around a minute or 2, so just wait and watch.
Some Important Points To Remember:-
1. The Sender’s Number (Facebook Mobile Number) and the Receiver’s Number (Victim’s Number), should be Precedded by the Country Code and then the Number.
2. WWW.SMSGLOBAL.COM allows only 25 SMS per Registration. So, as long as you have more Mobile Number to receive Password on it, You can keep trying.
3. This Trick requires the Victim to have Facebook activated on Mobile (Facebook via Mobile). If the Victim has not activated it, the Method is Invain !!

Check for the ‘Info’ Option in Profile of the Person you want to victimize. If the ‘Info’ contains the Phone Number, the Chances are high that he/she may have activated the Facebook Mobile. So, Just
Or
Just Paste the Following Link in your Address bar to find out
ENJOY THE TRICK ...............................................

Best Way to Bypass Captcha Verification 100% Working
12/18/2012
Hi all users, as you experienced some web services uses Captcha
image verification to restrict entry to bots for improving the security
and automated registrations. But sometimes these captcha codes become
very annoying and hard to read even by humans and becomes more time
consuming process.
.jpg)
But don't worry I've a solution for you. Today I will teach you how to
bypass all these annoying captchas. Rumola, a new browser addon, will be
helpful for you in this situation which allows you to bypass captcha
verification and automatically fills the captcha codes in websites for
you.
How to Bypass Captcha verification using Rumola ?
1. First of all Register an account at Rumola by clicking here. (you’ll get 10 free trials at registration)
2. Install the addon required for your browser.
3.After installing the addon, restart your browser if required. Once the plugin is activated, it will automatically start filling captchas for you.

CAPTCHA stands of "Completely Automated
Public Turing-test to tell Computers and Humans Apart", in simple words
it's a type of challenge-response test used in computing as an attempt
to ensure that the response is generated by a person (according to Wikipedia),
that means it's all about reading the word by yourself and writing it
as it is using your own mind/logic isn't it ? So you may think how they
fool captcha ? but you're wrong. Well let me tell how they do this.
They give you free first 10 entries during the first week after registration. Their service is based on speed. Just an instant and your captcha will appear on the other end of their planet where their workers are always ready to enter your captcha.
Note :- Once you start to fill other fields or double click captcha field, Rumola will initiate captcha recognition and read the numbers & letters and puts them in the box for you.
How to Bypass Captcha verification using Rumola ?
1. First of all Register an account at Rumola by clicking here. (you’ll get 10 free trials at registration)
2. Install the addon required for your browser.
- For Chrome : Install Rumola
- For Firefox : Install Rumola
- For Safari : Install Rumola
3.After installing the addon, restart your browser if required. Once the plugin is activated, it will automatically start filling captchas for you.
Below screenshot shows Rumola in action bypassing captcha input from user :
How This Service Works ?
They give you free first 10 entries during the first week after registration. Their service is based on speed. Just an instant and your captcha will appear on the other end of their planet where their workers are always ready to enter your captcha.
Note :- Once you start to fill other fields or double click captcha field, Rumola will initiate captcha recognition and read the numbers & letters and puts them in the box for you.
Enjoy.......
Make data transfer fast by copyfaster
12/17/2012
CopyFaster is a software utility that enables Windows Explorer to copy big files faster when copying to and from the same hard drive.
CopyFaster is faster because:
Less seeking - CopyFaster?s finer control over the copying process causes less time-consuming movement of the hard disk head. CopyFaster will try to read from the same section of the hard disk (where the head is positioned) multiple times before causing the head to move to another position (which is time consuming).
Uncached file access - CopyFaster bypasses Windows 2000?s file cache which normally speeds up repeated access to the same file, but is less useful for big files. Bypassing the file cache prevents extra wasted memory-to-memory copying from occurring.

Download CopyFaster free from official website
How To Recover Deleted Sms From Your Nokia Java Based Phones
12/16/2012
.jpg) I am Using Nokia Cell Phones From Last 4-5 Years But
Didn't Found Any Serious Bug In Them,After all Nokia Is A Big Multi
National Company.
I am Using Nokia Cell Phones From Last 4-5 Years But
Didn't Found Any Serious Bug In Them,After all Nokia Is A Big Multi
National Company.But Belive Me...Nokia Cell Phone Also Contains Some Serious Bugs..By Which We Can Able To Retrive Our Deleted SMS..
This Bug Is First Discovered By "Davide Del Vecchio". He Writes Nokia About That Bug.But They Don't Give Any Intention To Release A Patch For It.
And One Of INfoTechno Reader Commented On That Article That 70% of Nokia Phones Are Java Enabled...So Today I have Decided To Show You A Trick By Which You Can Able To Retrive
Or Recover Your Deleted SMS from Your Java Enabled Nokia Phones. :)
So Here's The Trick..
STEP 1: First Download And Install A Nokia Pc Suite For Your Mobile Phone.
You Can Download It From Here.
http://www.nokia.com/in-en/support/downloads/
STEP 2 :Connect Your Mobile Phone With Pc Suite.
STEP 3: Now Create A backup For Your Mobile Contents On Your Hard disk.
STEP 4: It Will Create A Huge Number Of .dat Files On Specified Directory.
STEP 5: Download And Install Software Named "Cygwin" From Here.
Cygwin Is A software Which Gives A linux Environment On Windows.
STEP 6: Open Cygwin And Open Your Backup Directory.
by Using Cd Command.
Syntax for that command Is.
Cd "full path to your specified directory". (without Quotes)
STEP 7: Then After Type "ls -al | less" without Quotes And Press Enter.
You Will See Something Like This.
total 0016

 drwx------+ 2 Administrator Akv      0 Feb  6 01:35 .
 drwx------+ 7 Administrator Akv      0 Feb  5 23:00 ..
-rwx------+ 1 Administrator Akv   2972 Nov 27  2003 1.dat
-rwx------+ 1 Administrator Akv  22913 Nov 27  2003 10.dat
STEP 8: Now Choose A File To Examine.
For i.e Type "strings 3102.dat | less"
where 3102.dat is a file name for which you want to examine.
And Press Enter.
You Will See Some Part Of the Deleted SMS Like.
Hello How Are Yo
STEP 9: Now Just Search For The Matching Text By Using Grep Command...Now Type
grep -i "Hello How Are Yo"
You Will See Some Part Of the Deleted SMS Like.
Hello How Are Yo
STEP 9: Now Just Search For The Matching Text By Using Grep Command...Now Type
grep -i "Hello How Are Yo"
And Press Enter
you Will See Something Like This..
Binary file 1770.dat matches

Binary file 3102.dat matches
"3102.dat is The file That We are Examining and 1770.dat is the File That Contains the Complete SMS"
STEP 10: Now Type "strings 1770.dat"
where 1770.dat is Your File Name.
And Press Enter
Bingo...
The Complete SMS is On Your Screen...
And Press Enter
Bingo...
The Complete SMS is On Your Screen...
How to Disable Social Networks from tracking you ?
12/14/2012
How Social Networking Sites Can Track You
For example, when you are logged into your Google or Facebook account and visit a movie review page on rottentomatoes.com, your browser automatically pulls in the "+1" button from Google's servers and the "Like" button from Facebook. These downloads include the session cookies your browser uses to inform Google and Facebook that you have previously logged in, and so Google and Facebook automatically learn about your personal interest in the movie page you're looking at, even if you never actually click on either of their buttons.
Download/Install
How Priv3 Works
Blocking simple "web bugs" or "trackers" is fairly straightforward, because doing so does not harm your web surfing experience. By contrast, completely blocking social networking features is counterproductive, because doing prevents you from actually using these features—say to leave a comment, or to "like" something—when you would like to do so.
You may also read :-
HACK WEBSITES USING HAVIJ DOWNLOAD FULL VERSION
Therefore, Priv3 does not block third-party interactions completely. Instead, it selectively suppresses the inclusion of third-party web cookies when your browser pulls in content from the social networks, but does provide them if you decide to interact with the social networking features. You still see the number of "likes" the page has accumulated on Facebook or the comments other people left using Facebook's discussion mechanism. Facebook however only learns the IP address of the computer you are using.
Should you decide to interact with the social feature, Priv3 detects any mouseclick or keystroke directed at the feature. It then reloads it with your session cookies and passes on the click or keystroke, thus revealing your identity to the social network and informing it of your desired action.
Priv3's Currently Supported Social Networking Sites
Priv3 currently understands the interactive features of the following social networks:
Google +1
How to Recover Your Gmail Account?
12/14/2012
Now a days, hacking gmail account is increasing. Most of people doesn't
know how to be secure(because they doesn't visit BreakTheSecurity). So
please refer our website to your friends as Security tips Blog. Ok let
me come to the point. In this article, i will explain how to recover
your hacked or compromised gmail accounts.
First of all verify yourself whether your entering the correct password. Also check whether the caps lock is turned on.

If you believe your account is hacked, then visit click the Can't access your account? link below the signin button in gmail.
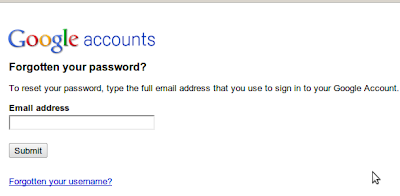
Enter the Email address . it might ask for CAPTCHA ,fill it and continue.
option 1: If you have secondary email address, select secondary mail and ask to send the password to your secondary mail address.
option 2: Answer to your security question and change the password
option 3: if you have added mobile number in your account. then you can recover through mobile.
Contact Gmail:
If the above option doesn't work for you? then you have to contact the gmail.
Visit https://www.google.com/support/accounts/bin/request.py?ara=1
It will ask whether the password recovery option worked or not. Click "No" button. It will ask you to enter the information about your email account. Fill everything. They will ask to enter the email to contact you, enter the alternative email address that you have.(if that also hacked, then create new account and enter it).

Submit the form.
They will contact you soon.
Begin by scrolling to the bottom of your Gmail page and see if there are any other sessions signed into your account ("This account is open in 1 other location"). Then click the word "Details" where it says "Last account activity" and then "Sign out all other sessions". Now change your password to anything reasonable but without worrying too much about how secure because you are going to change it again. Next check all the following items and verify that they are set correctly.
Note: in the following “Settings” means “Mail settings” as found under the Gear icon in the upper/right of the Gmail window. If you still have the old layout, then “Settings” will be one of the choices along the top. If you have the older “Settings” link, some of the paths below will be slightly different.
Account Security:
Potential Spam:
E-mail Theft
First of all verify yourself whether your entering the correct password. Also check whether the caps lock is turned on.
How to Recover Your Gmail Account?
Enter the Email address . it might ask for CAPTCHA ,fill it and continue.
option 1: If you have secondary email address, select secondary mail and ask to send the password to your secondary mail address.
option 2: Answer to your security question and change the password
option 3: if you have added mobile number in your account. then you can recover through mobile.
Contact Gmail:
If the above option doesn't work for you? then you have to contact the gmail.
Visit https://www.google.com/support/accounts/bin/request.py?ara=1
It will ask whether the password recovery option worked or not. Click "No" button. It will ask you to enter the information about your email account. Fill everything. They will ask to enter the email to contact you, enter the alternative email address that you have.(if that also hacked, then create new account and enter it).
Submit the form.
They will contact you soon.
When you reclaim Your Account:
Begin by scrolling to the bottom of your Gmail page and see if there are any other sessions signed into your account ("This account is open in 1 other location"). Then click the word "Details" where it says "Last account activity" and then "Sign out all other sessions". Now change your password to anything reasonable but without worrying too much about how secure because you are going to change it again. Next check all the following items and verify that they are set correctly.
Note: in the following “Settings” means “Mail settings” as found under the Gear icon in the upper/right of the Gmail window. If you still have the old layout, then “Settings” will be one of the choices along the top. If you have the older “Settings” link, some of the paths below will be slightly different.
Account Security:
- Settings -> Accounts and Import -> Change Account Settings -> Change Password [pick a new secure password]
- Settings -> Accounts and Import -> Change Account Settings -> Change password recovery options [verify secret question, SMS and recovery e-mail address]
- Settings -> Accounts and Import -> Change Account Settings -> Other Google account settings -> Email Address -> Edit [verify your name and other settings]
- Settings -> Accounts and Import -> Change Account Settings -> Other Google account settings -> Authorizing applications & sites [revoke Access to any sites listed]
- Settings -> Accounts and Import -> Change Account Settings -> Other Google account settings -> Using 2-step verification [enable 2-step verification]
Potential Spam:
- Settings -> General -> Signature [make sure nothing as been added]
- Settings -> General -> Vacation Responder [make sure it's disabled and empty]
E-mail Theft
- Settings -> Forwarding and POP/IMAP -> POP Download [disabled]
- Settings -> Forwarding and POP/IMAP -> IMAP Access [disabled]
- Settings -> Forwarding and POP/IMAP -> Forwarding [disabled or correct address]
- Settings -> Filters [no filters that forward or delete e-mail]
- Settings -> Accounts and Import -> Send Mail As [make sure it is using your correct e-mail address, delete any unrecognized entries]


.jpg)
.jpg)

.jpg)


